Run out of room on your walls for shelves? Here's another idea that will allow you to be more space-sufficient.
Materials
Item
2x4 x 8"
4' x 8' sheet of 3/4" plywood
1x2 x 8' pine stop strip
Carpenter’s glue
1/4" x 3-1/2" lag screws and washers
2" wood screws
3" wood screws
23-1/2" x 19-1/2" x 13" plastic totes
Quantity
2
1/2
1
1 pint
16
1 box
1 box
6
Cutting List
Item
3/4" x 3" x 48" plywood bottom carriage flanges
3/4" x 5" x 48" plywood top carriage flanges
1-1/2" x 3-1/2" pine carriage stringers
3/4" x 1-1/2" x 8' pine stop strip*
* = based on tote sizes we used
Quanitity
4
4
4
1
Choose a Spot
The perfect spot is right about your garage door; space that would not be useful otherwise
Measure
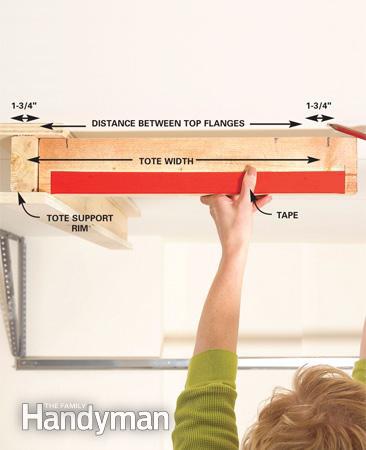
Measure the tote rims (3/4 in) and the size of the bottom flanges of the carriages (3 in).
Bottom Flanges
Cut 3-in-wide strips of 3/4 ply for the bottom flange. Center them on 4-ft 2x4's and glue & screw them in. Use 2-in screws every 10 inches.
Complete Carriages
Flip the carriage assemblies over. Center the 5-in-wide ply top flanges and glue & screw them in.
Mark Joists
Find the studs with a stud finder, then snap a chalk line. Probe it with a nail to make sure the line is centered on the joist.
Screw it in
Mark each carriage 12 inches from the end and align the mark with the joist location. Screw the carriage temporarily to each joist on one side of the flange with 3-in screws
Mark Carriage Locations
Cut a 2x4 template from tote dimensions and mark the location of the top edge of the next carriage. Also mark the rear side, screw it in, and the other carriages in place (on one side only)
Test the Fit
Make sure the tote rims have maximum bearing on the bottom flanges. Make adjustments.
Add Lags to Joists
When satisfied, drill 3/16"-pilot holes in top flanges. Drive pairs of 3.5" lag screws into each joist and remove temporary screws. Use at least 4 lags per carriage.
Add Stoppers
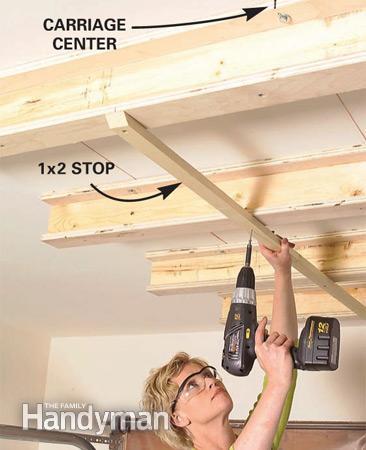
Mark the center and screw a 1x2 on the mark. Fill the storage containers, make a list of the contents, and enjoy your new place to keep things!


